
How To Build a Grill Cart {The Home Depot DIY Workshop}
/*Today's post is brought to you by The Home Depot*
After a long Winter (aren't they always long in Iowa?), we have finally reached grilling season! It's time to slap some burgers and brats on the grill and enjoy with friends and family. When it's not down-pouring that is (we can't win!).
A few weeks ago I mentioned I would be attending the DIY Workshop at The Home Depot in Des Moines. In the mean time, Nate and I were busy whipping up our customized version of the grill cart. In true Nate and Michelle fashion we made it harder than it needed to be. Go team!

Want to make your own rolling grill cart? Join us on Saturday at The Home Depot in Des Moines, IA where we'll be sharing our tips and tricks! We also have a few Ryobi tools to giveaway. It should be a fabulous time.

Today we're sharing our customized plans for our version of the grill cart. The great thing about the DIY Workshops is that you learn the basics. You can take the info and use it to make a project that works for you and your lifestyle! As always, it appears to be a ton of steps but this project took about 3-4 hours to build which makes for a great weekend project!

Material List
- 3 - 2"x8"x8' (we used standard stud grade lumber for all)
- 2 - 1"x4"x8'
- 1 - 1"x3"x8'
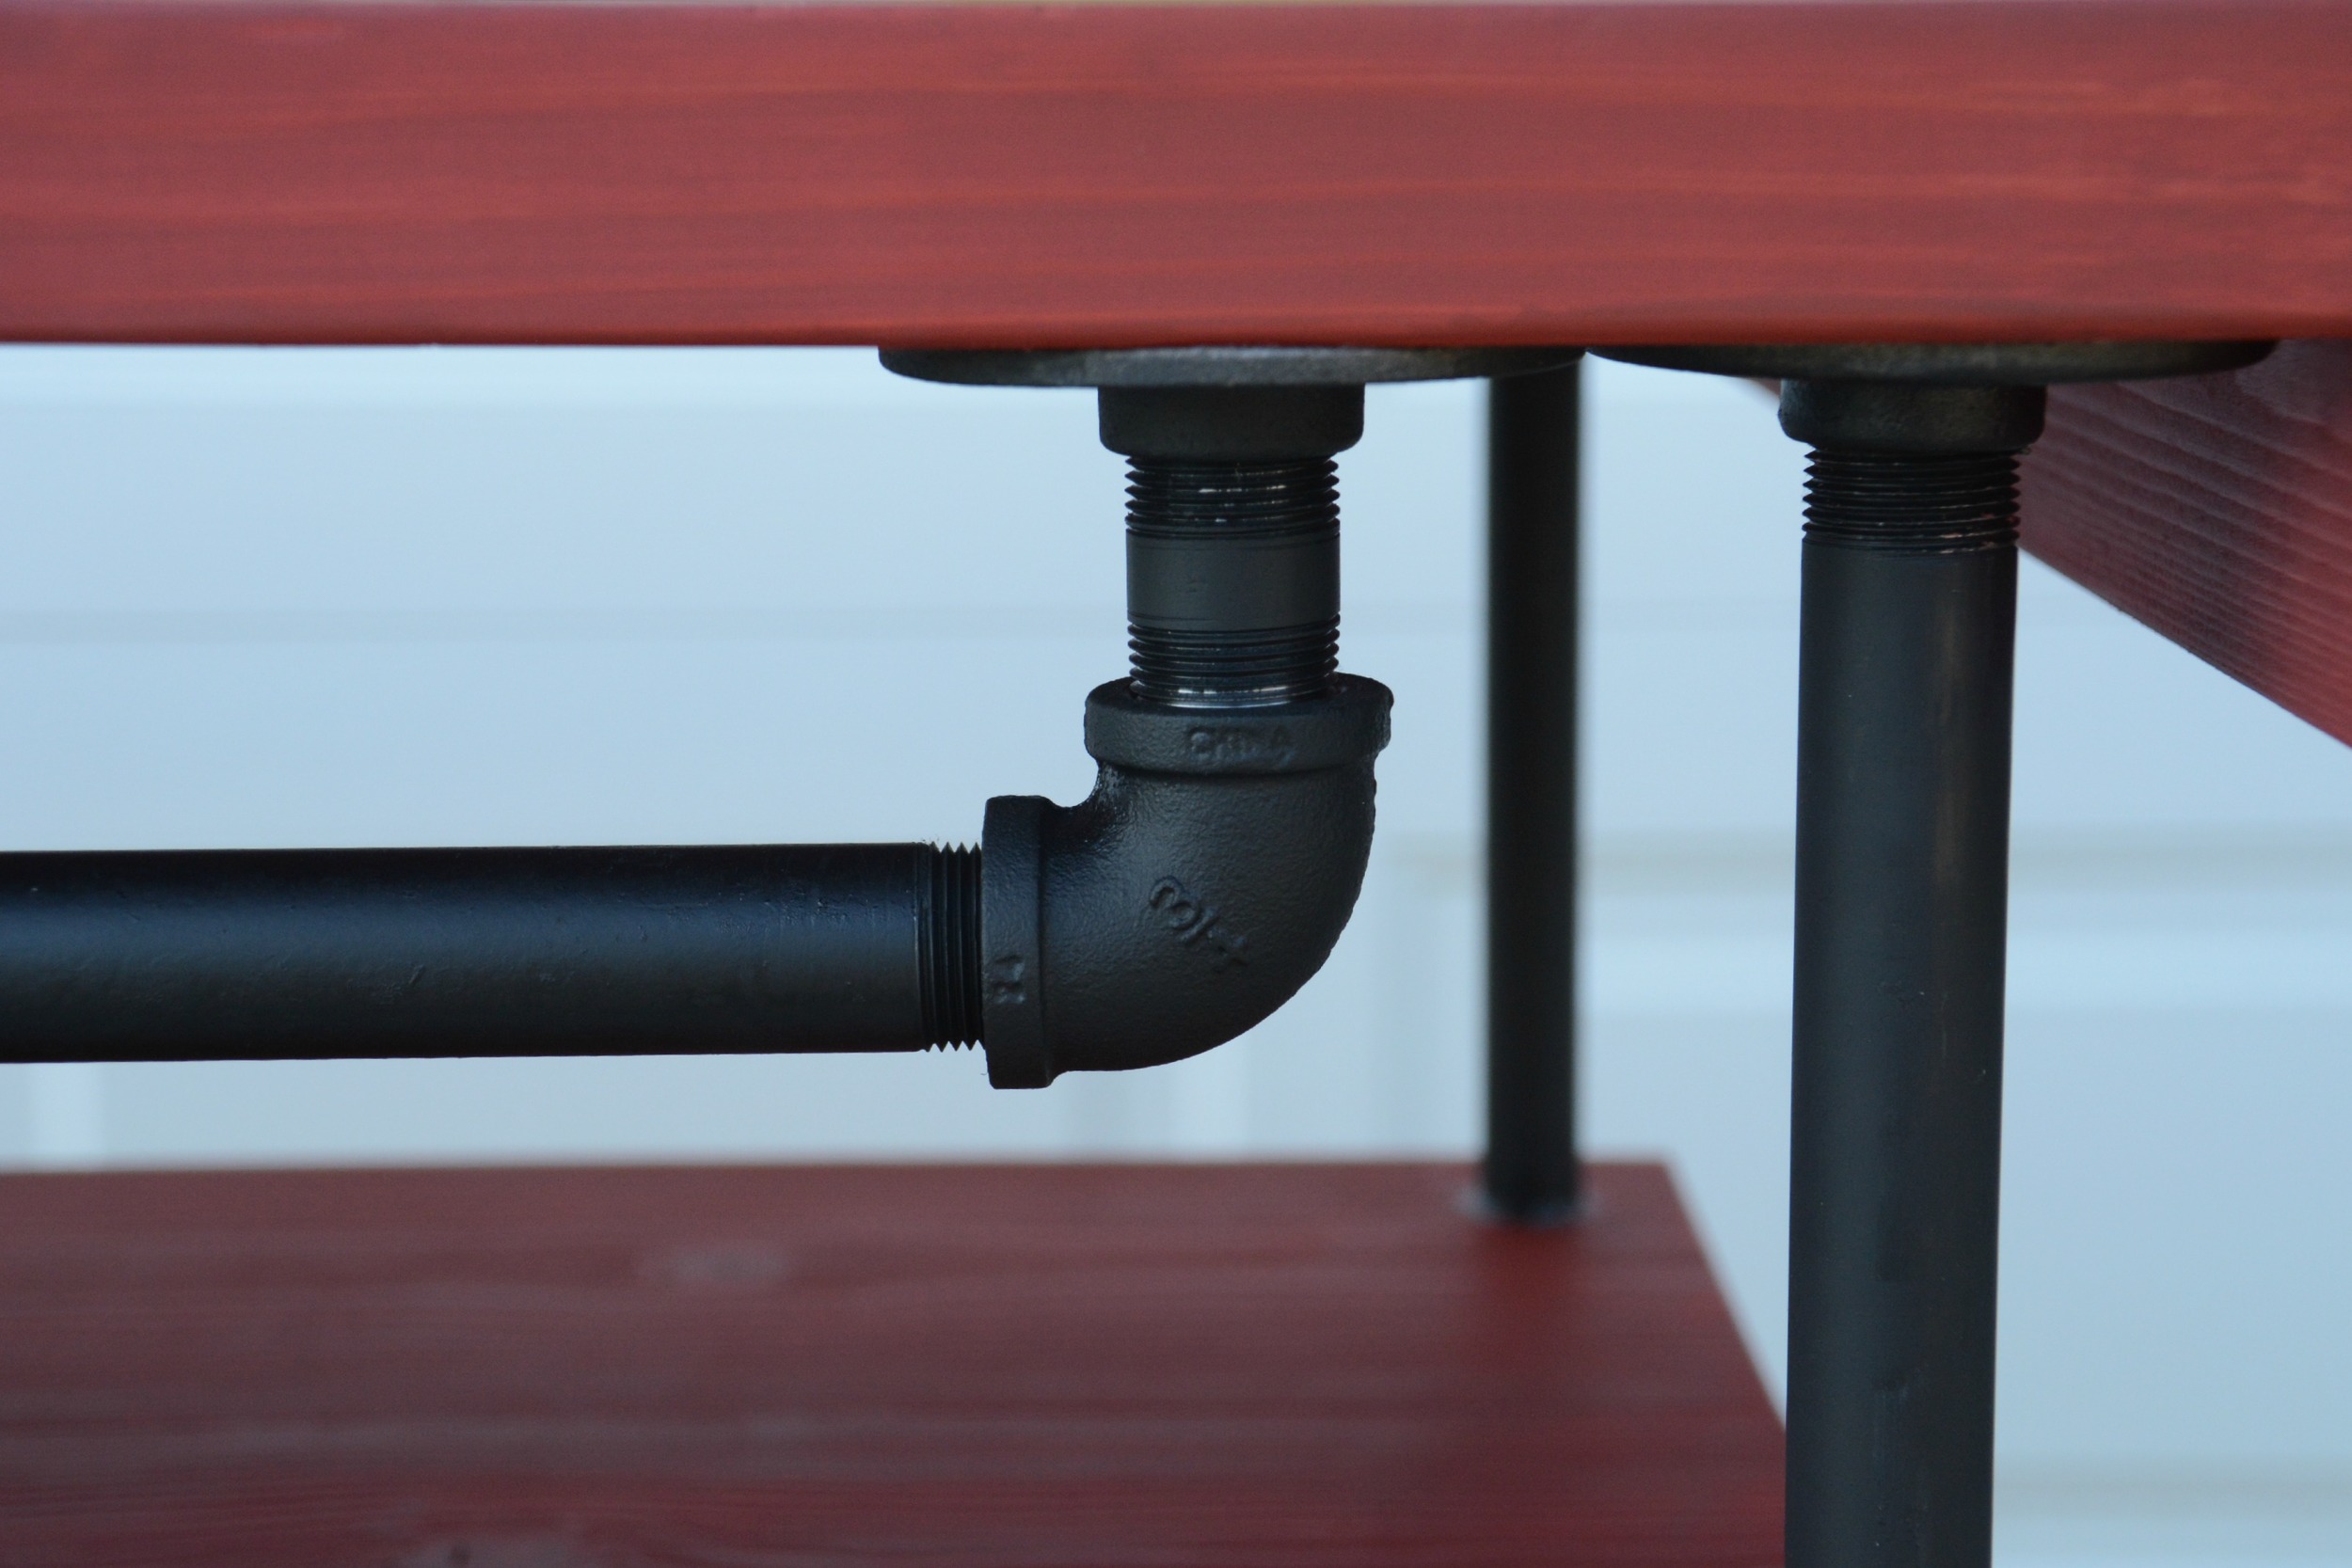
- 8 - 12" 3/4" black iron pipe
- 1 - 18" 3/4" black iron pipe
- 2 - 1" 3/4" black iron pipe
- 10 - 3/4" black iron flanges
- 4 - 3/4" black iron couplers
- 2 - 3/4" 90 degree elbows
- 4 - Caster Wheels
- 1 1/4" outdoor screws
- Outdoor wood glue
- Kreg HD pocket hole jig
- 2 1/2" Kreg HD pocket hole screws
- Outdoor stain/sealer (we used Behr's Solid Color Weather proofing All-In-One Wood Stain and Sealer in Barn Red)
- Outdoor spray paint (we used black for the legs)
- Outdoor wood filler
- Outdoor silicone caulk
- Eye hooks
- Beverage opener
- Brad nailer
- 1 1/4" brad nails
- Power drill
- 1" drill bit
- Clamps (at least 24")
- Belt sander
- Palm or rotary sander
Cut List
- 2"x8"
- - 30" - 9
- 1"x4"
- - 22" - 4
- - 6" - 4
- 1"x3"
- - 20.5" - 4
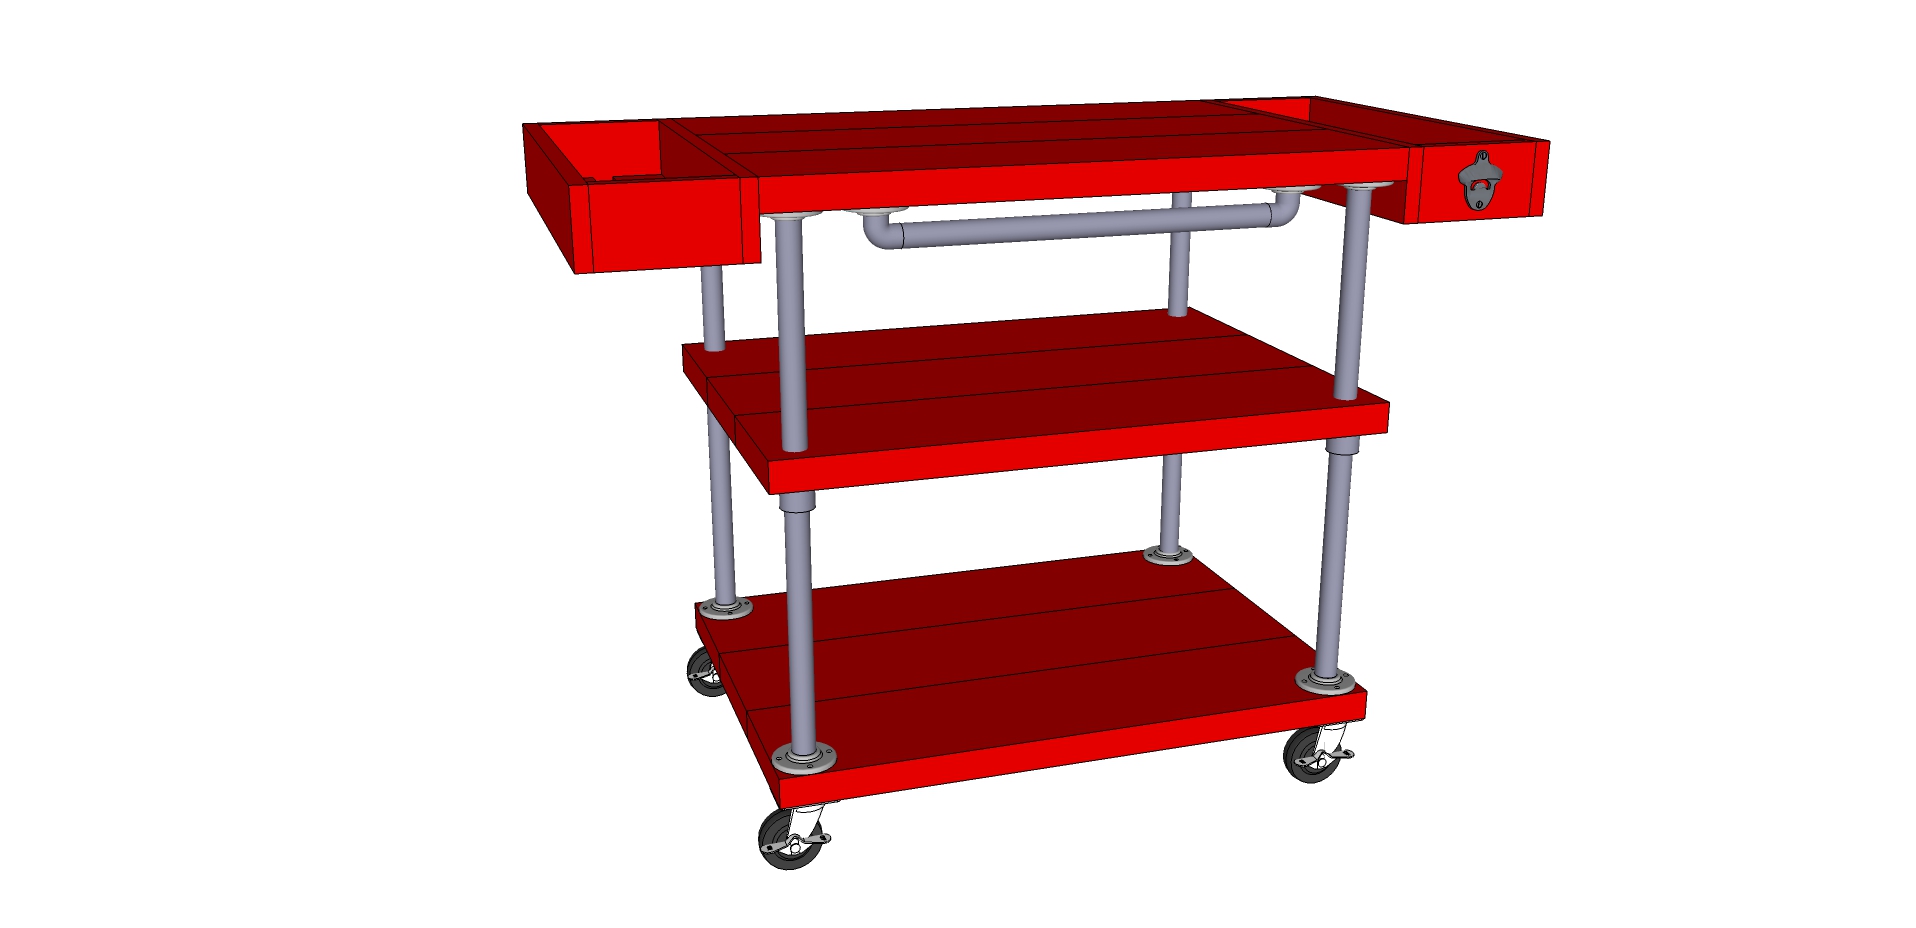
On the backs of two of the three 30" 2x8 boards, drill 3 pocket holes using the Kreg jig. Using wood glue between the boards, attach using the 2 1/2" pocket hole screws. Clamp until the wood glue sets on all 3 shelves. Using the belt and/or palm sander sand shelves until level and smooth.

Create the side boxes by putting the 6" 1x4's between the 22" 1x4's, using wood glue and nailing together with 1 1/4" and clamp until glue sets. Place the 20.5" 1x3's on the inside of the boxes so they are on the outside of the boxes (there will be a gap in the middle). Using wood glue and 1 1/4" brad nails attach.

On the middle shelf, mark 1.25" in on all 4 corners. Drill hole with 1" drill bit (this hole will have the 3/4" pipe running through it, so make sure the 1" bit bill work for the pipe you purchased)
At this point in time we stained all surfaces with the outdoor stain/sealer. We did not anticipate ever putting food directly on the surface, so we went with a product that will seal the wood as it will be kept outdoors. If you anticipate placing food directly on the surface when preparing then use a food safe product such as butcher block sealer.
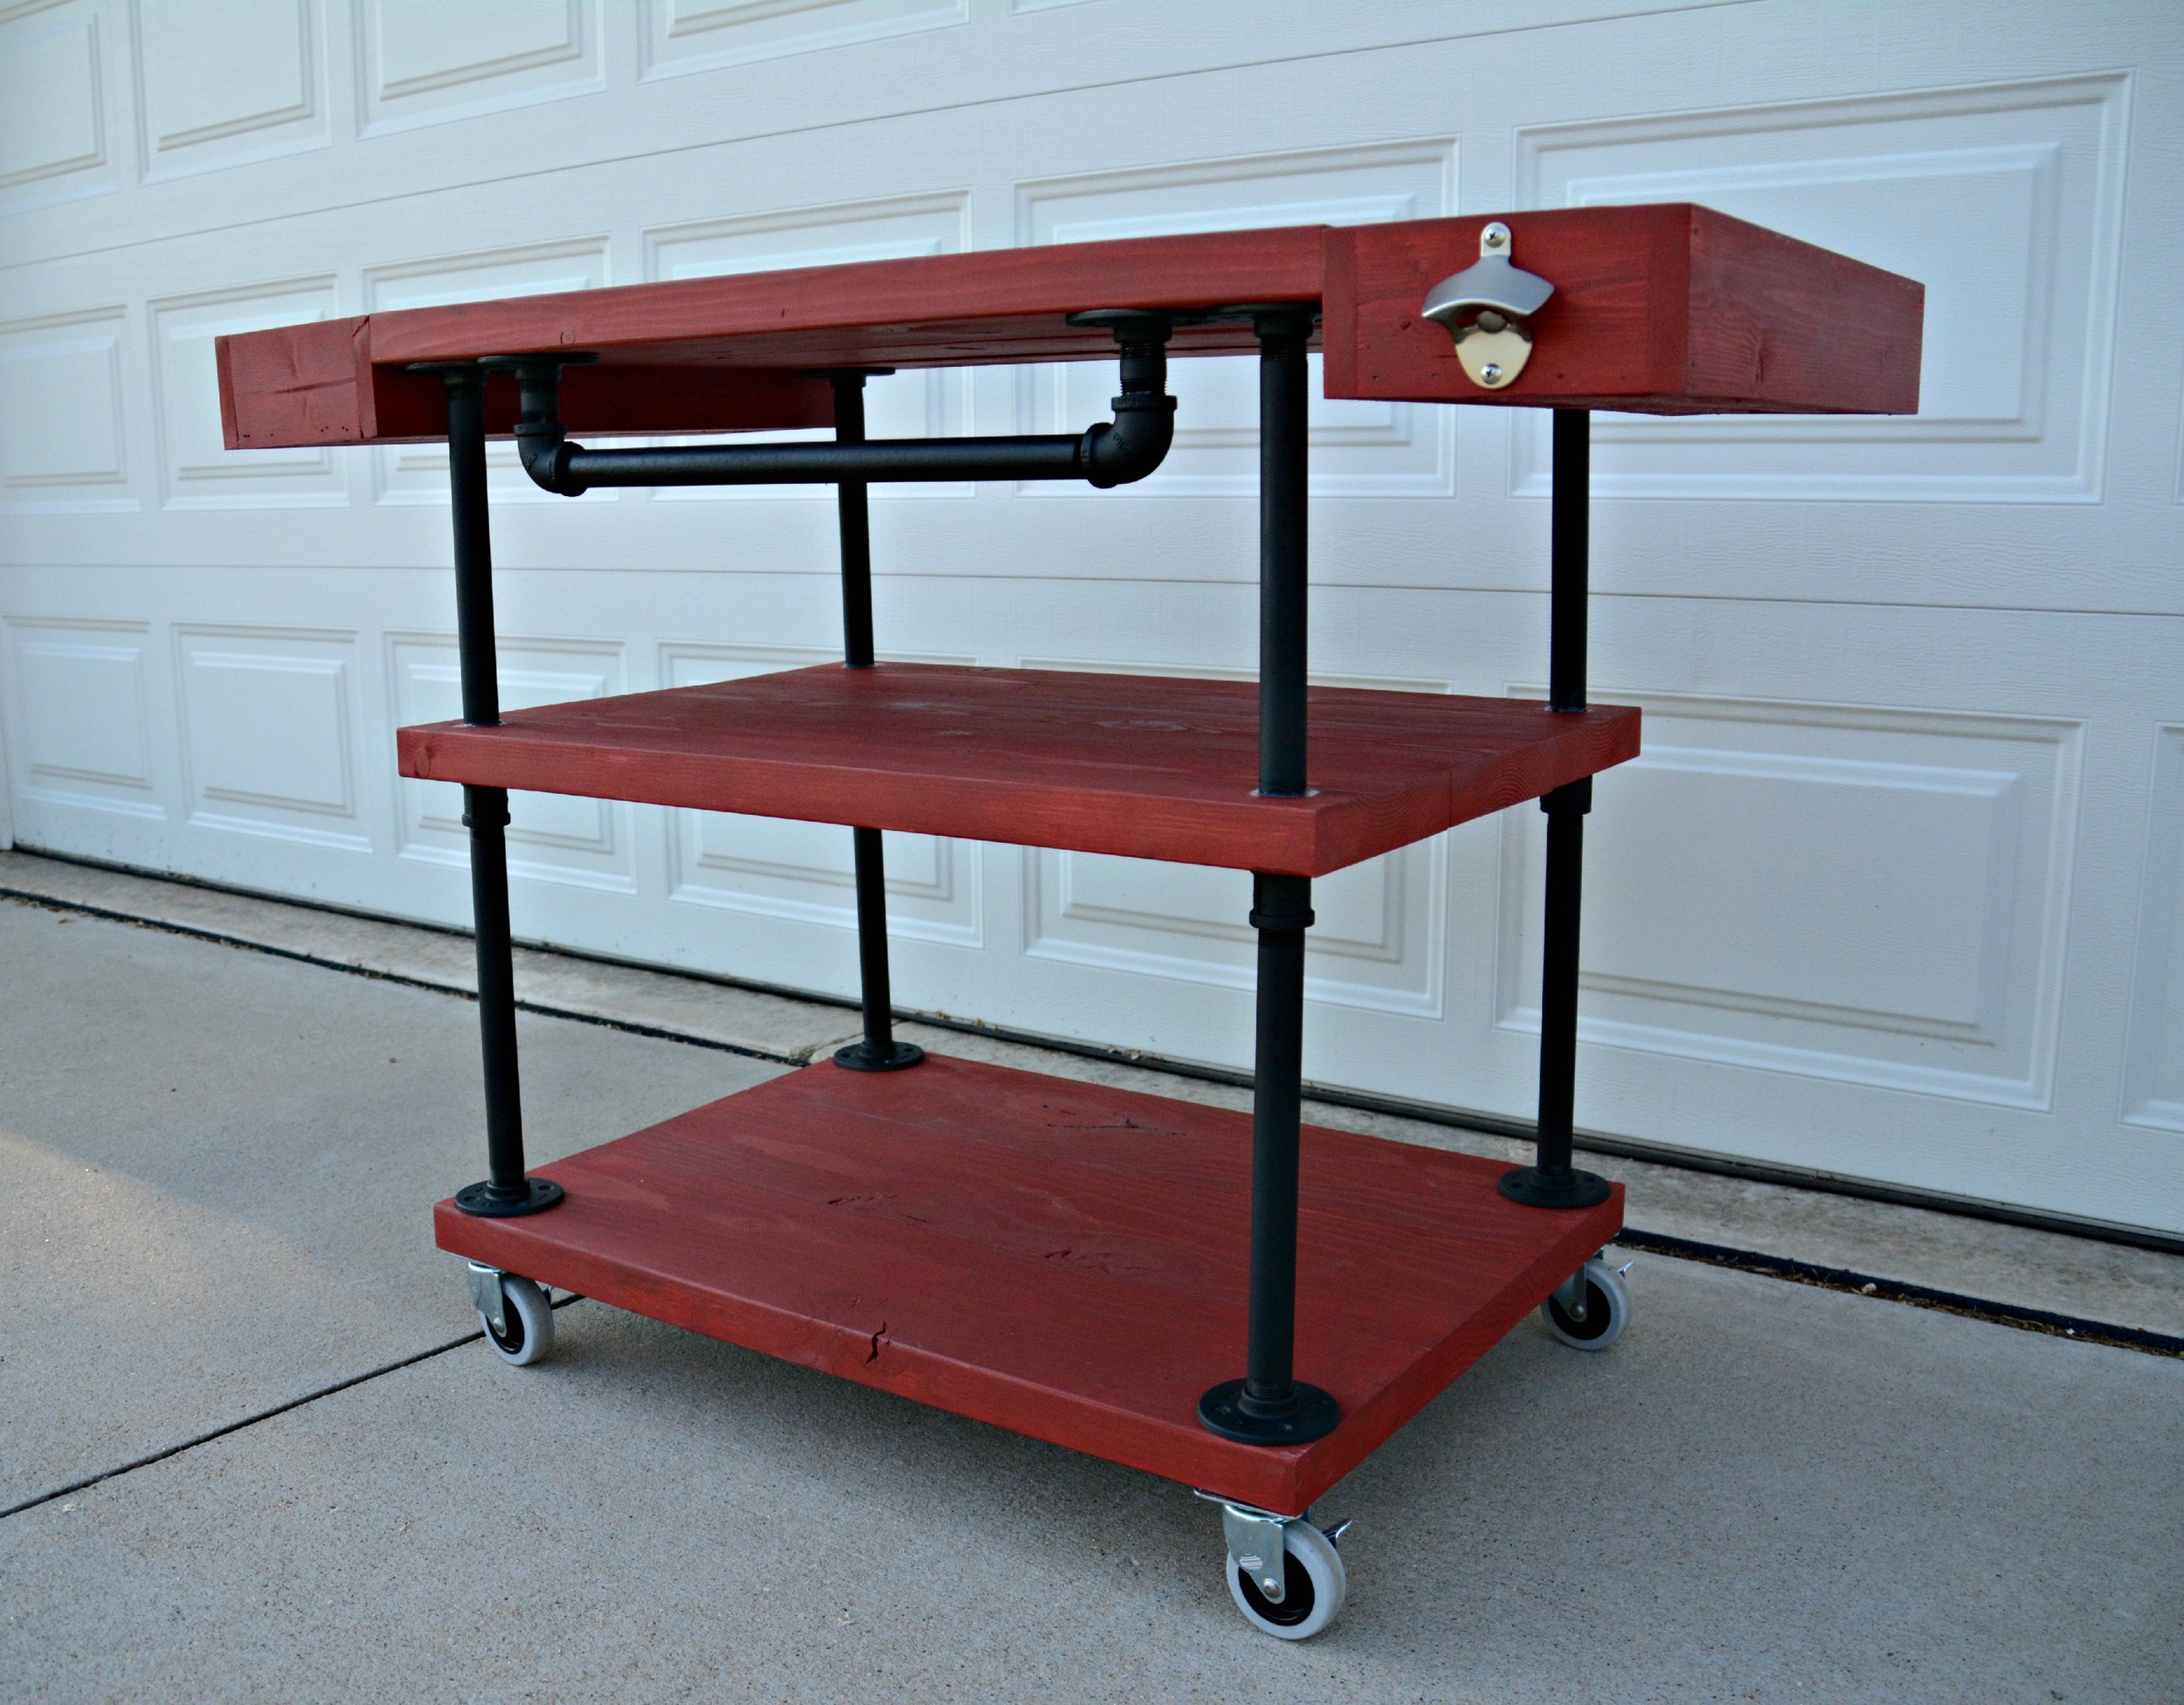
Sometimes black iron can be greasy, so clean all pieces. Assemble the legs by attaching a 12" pipe to the one flange on one end, and a 3/4" coupler on the other end. Then attach another 12" pipe on the other end of the coupler. Make the towel bar by attaching 1" pipe to flanges, then attach 90 degree elbows to 1" pipe. Attach the 18" pipe to each elbow.
Spray paint all parts, and let dry according to directions (important as you want it to be fully cured as you will be sliding the pipes through the middle shelf and you could scratch the paint.)
Attach the assembled legs to the bottom shelf by attaching with 1 1/4" screws on each corner.

Slide the middle shelf onto the pipes through the holes drilled earlier. I sealed any gaps between the pipe and the shelf with some outdoor silicone caulk.

Screw the flanges onto the tops of the legs. Attach the top shelf with 1 1/4" screws.

Attach towel bar to bottom side of top shelf.
Attach casters to bottom of cart.
Attach side trays using wood glue and 1 1/4" screws into the top shelf. Use outdoor wood filler to fill holes, once dry stain the filler.
Attach beverage opener to one of the trays at desired location.

It's now time to put that grill cart to good use. I bet dad would love one of these for Father's Day!
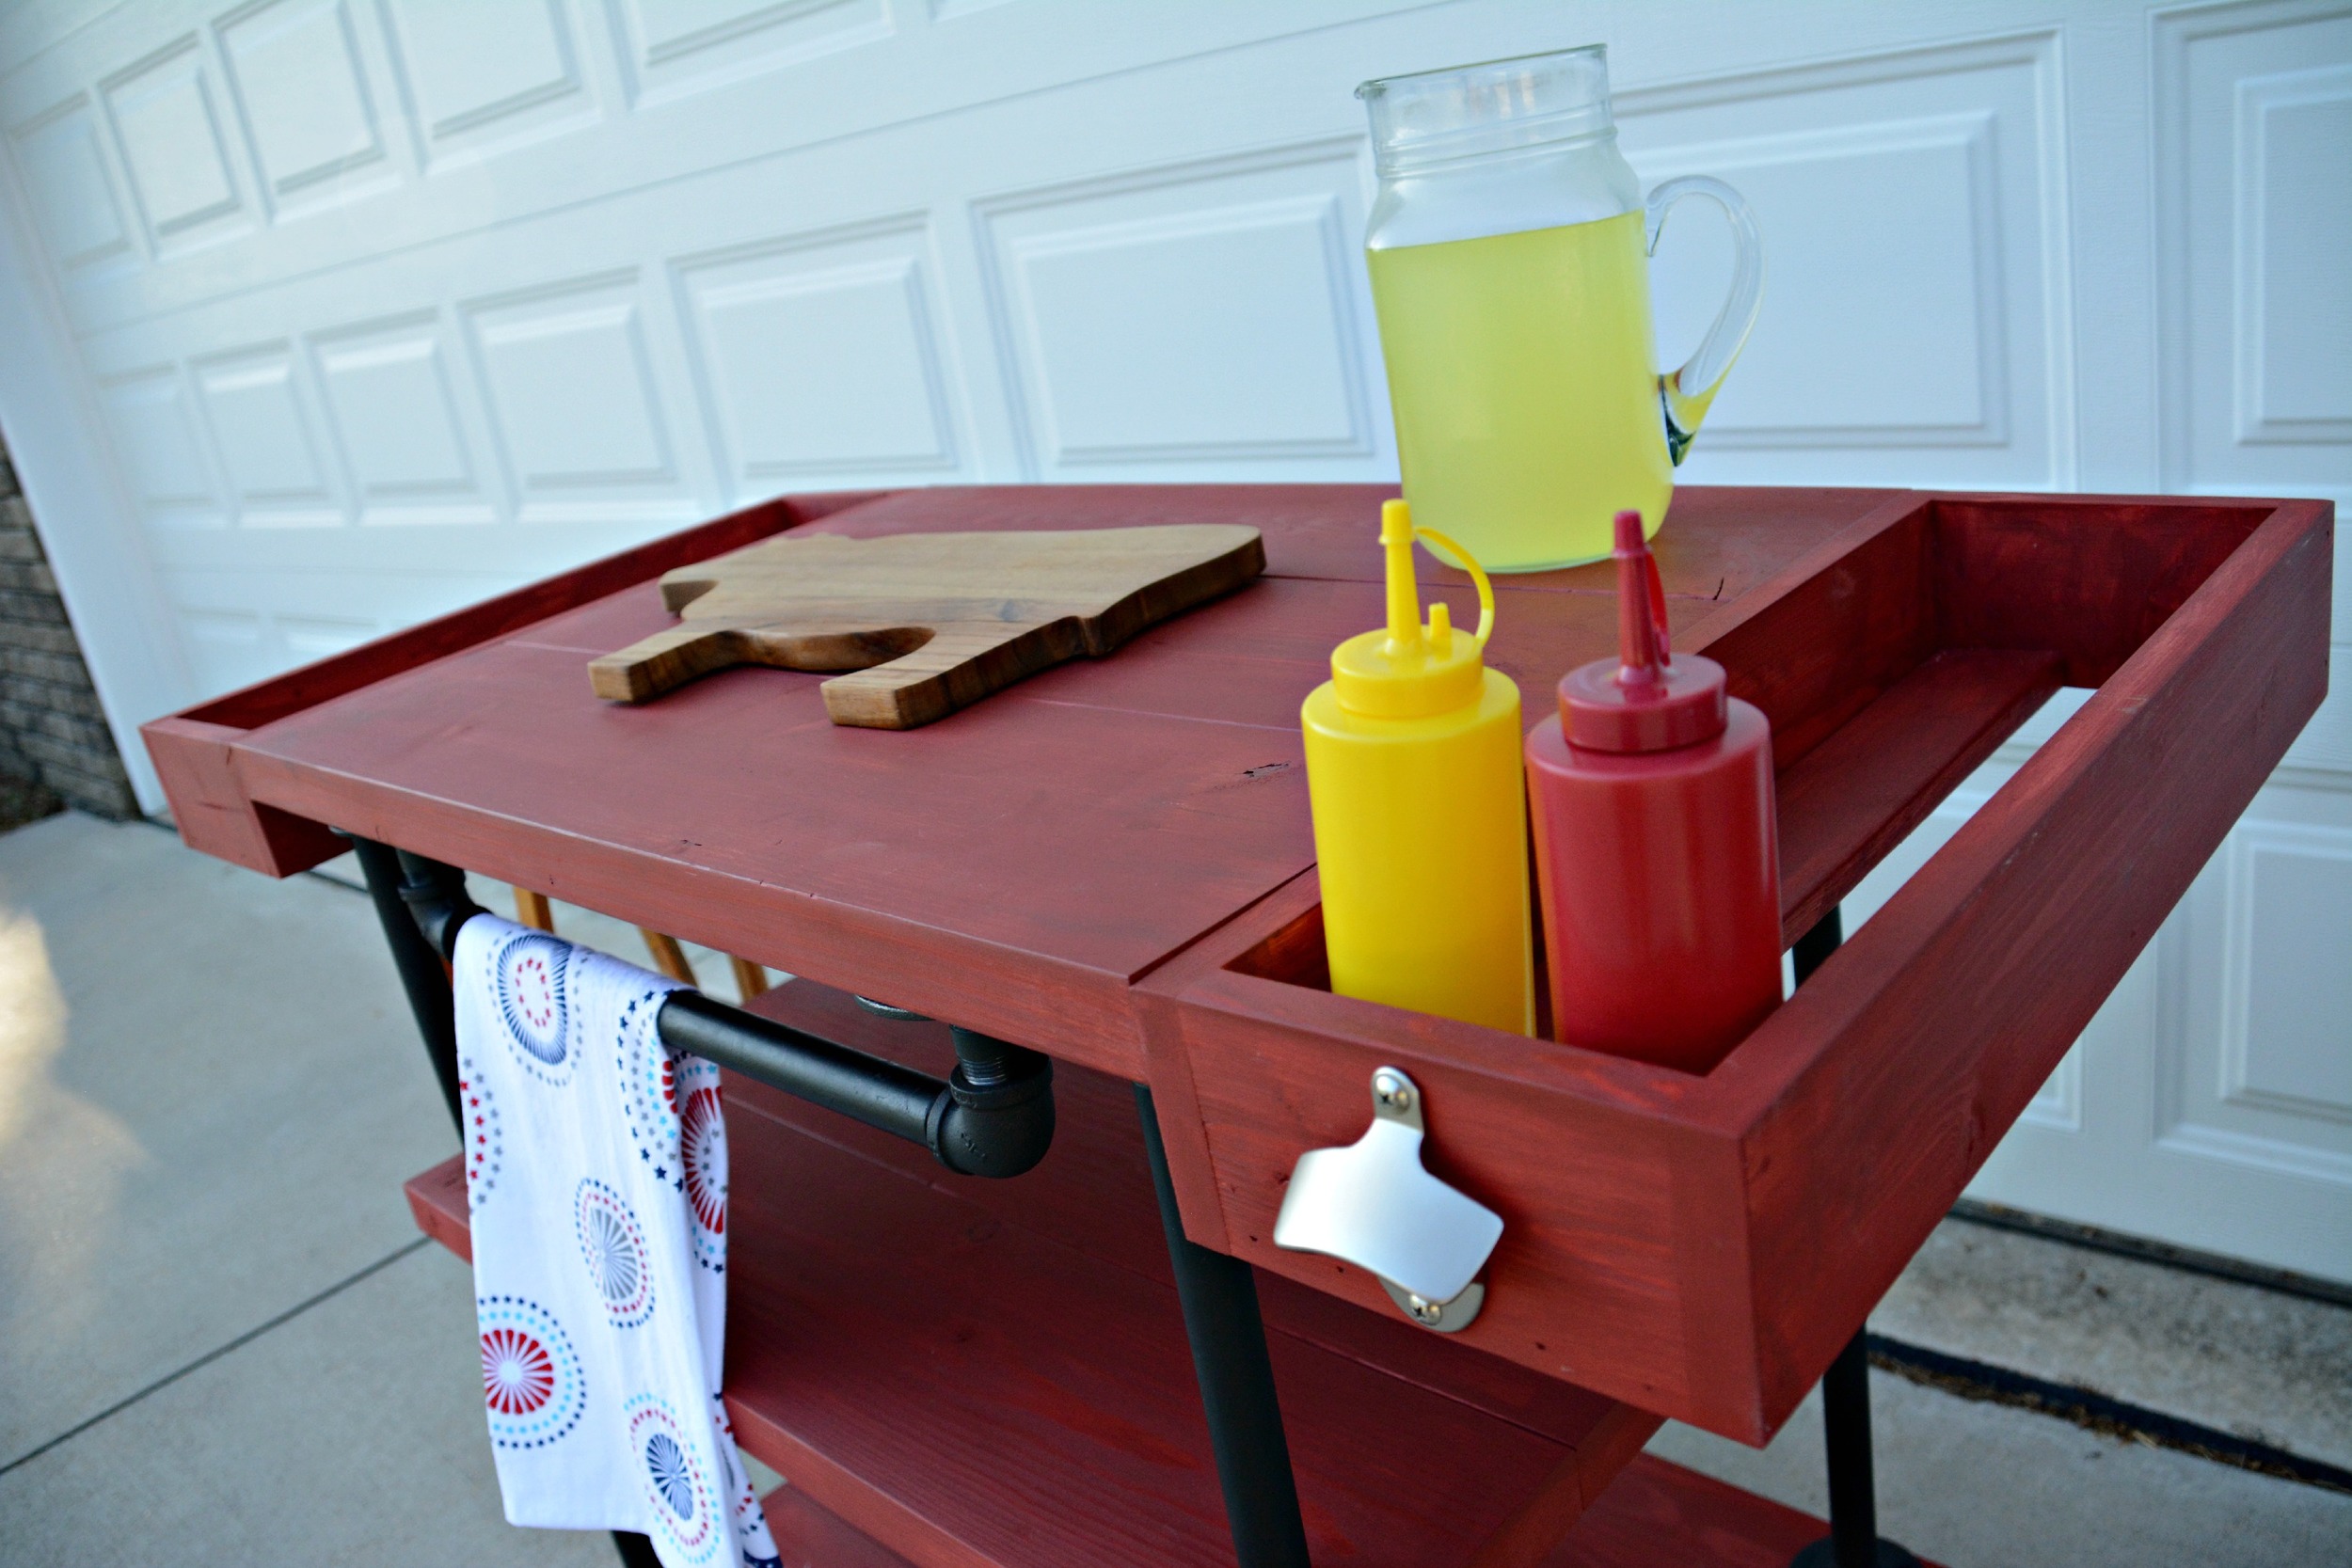
We added condiment holders on each side. This way there is plenty of room to work and hold all of the grilling items you need. Nate also added a beer opener to ours because I guess you can't grill without an adult beverage. Or Coke from a bottle.

We're big fans of the industrial look so we went with some metal piping for a towel bar and the side supports.
Inexpensive hooks hold all of your necessary grilling tools.


A quick reminder about Saturday's event!
Who: You! Your friends! Your family! Your co-workers! Everyone you know!
What: Learn how to build your very own grill cart at The Home Depot Do-It-Yourself (DIY) Workshop. (It's free!)
When: Saturday, June 20th from 10:00-11:30am.
Where: The Home Depot nearest you! Nate and I will be attending the Des Moines, Iowa location. (4900 SE 14th St)
Don't forget to register!


I'm excited to see some of you on Saturday! If you're not local, be sure to share using #DIYWorkshop so I can see what you're up to!


